Display
LCD 屏幕显示库
M5 系列显示库说明
1. Display
底层图形库,提供屏幕绘制、文字、线条、颜色管理等基础功能。
可独立使用,适合只需要绘制图形或文字的场景。
2. M5Widgets
基础控件库,提供标签、图片显示等 UI 控件。
底层依赖 M5GFX。
适合需要简单交互控件的界面。
3. M5UI
高层 UI 框架,基于 LVGL 封装。
提供页面管理、多控件布局和统一事件处理。
使用提示
⚠️ 不建议同时混用 M5GFX、M5Widgets、M5UI,可能导致渲染异常或事件冲突。
单独绘图 → 使用 M5GFX。
简单控件交互 → 使用 M5Widgets。
多页面 UI → 使用 M5UI。
UiFlow2 应用示例
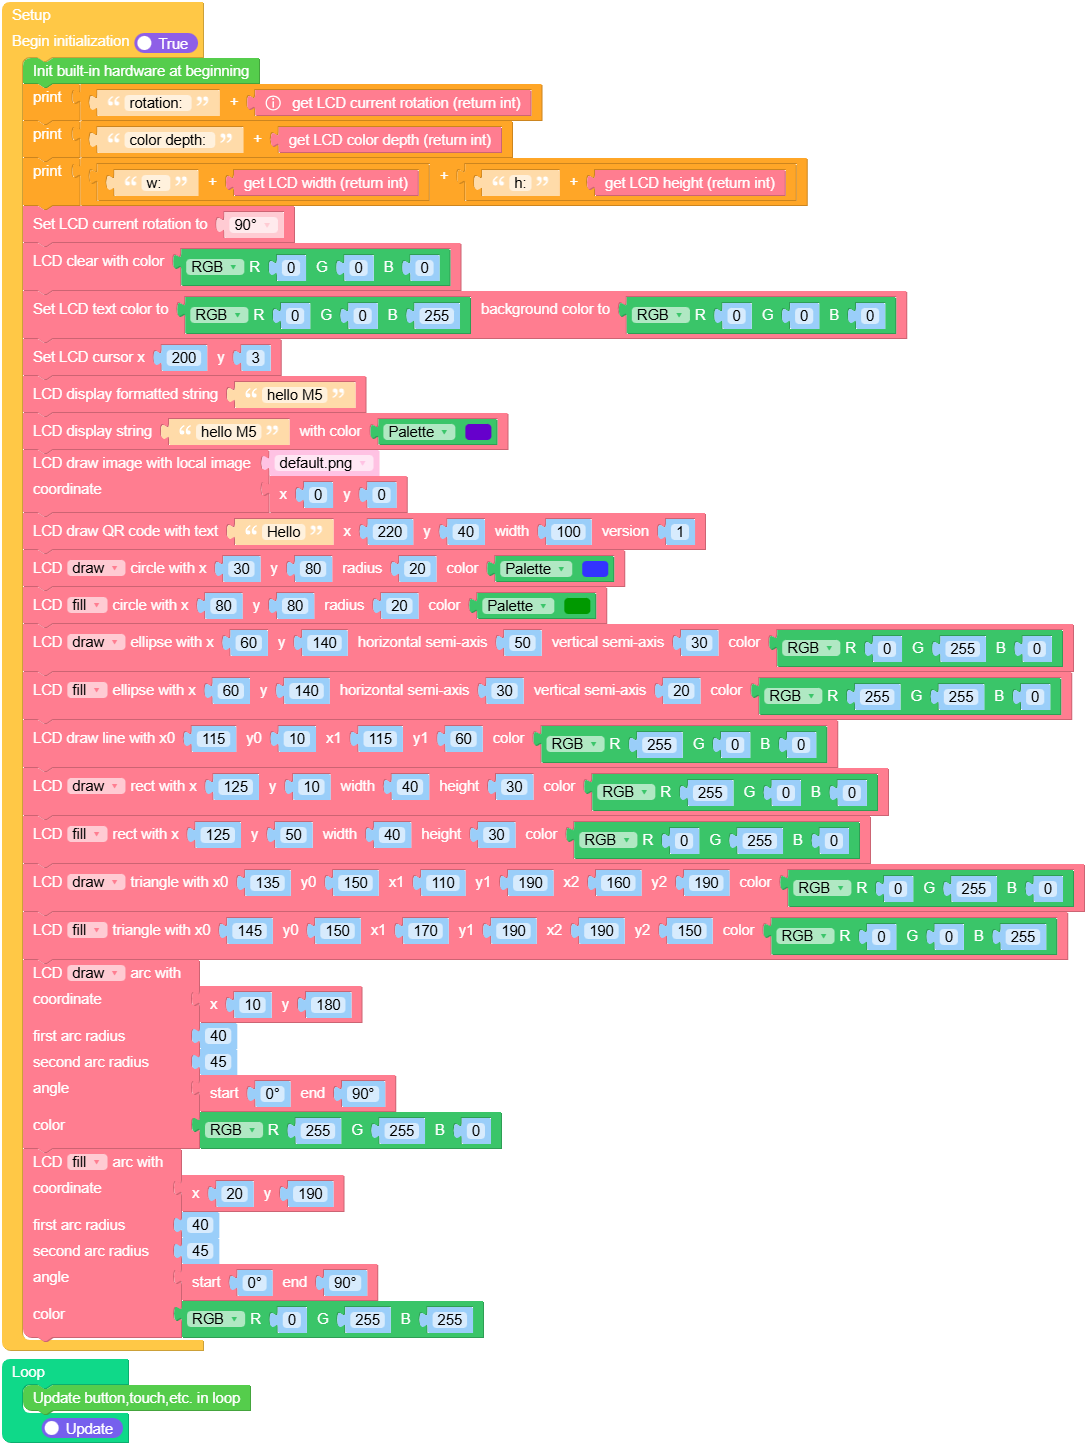
绘图测试
在 UiFlow2 上打开 cores3_draw_test_example.m5f2 项目。
本示例演示了 M5.Lcd 的基本绘图功能,包括文字、图片、二维码以及各种图形。
UiFlow2 代码块:
示例输出:
无
MicroPython 应用示例
绘图测试
本示例演示了 M5.Lcd 的基本绘图功能,包括文字、图片、二维码以及各种图形。
MicroPython 代码块:
 1# SPDX-FileCopyrightText: 2025 M5Stack Technology CO LTD
 2#
 3# SPDX-License-Identifier: MIT
 4import os, sys, io
 5import M5
 6from M5 import *
 7
 8
 9def setup():
10    M5.begin()
11    Widgets.setRotation(1)
12    Widgets.fillScreen(0x222222)
13    print((str("rotation: ") + str((M5.Lcd.getRotation()))))
14    print((str("color depth: ") + str((M5.Lcd.getColorDepth()))))
15    print((str((str("w: ") + str((M5.Lcd.width())))) + str((str("h:") + str((M5.Lcd.height()))))))
16    M5.Lcd.setRotation(1)
17    M5.Lcd.clear(0x000000)
18    M5.Lcd.setTextColor(0x0000FF, 0x000000)
19    M5.Lcd.setCursor(200, 3)
20    M5.Lcd.printf("hello M5")
21    M5.Lcd.print("hello M5", 0x6600CC)
22    M5.Lcd.drawImage("/flash/res/img/default.png", 0, 0)
23    M5.Lcd.drawQR("Hello", 220, 40, 100, 1)
24    M5.Lcd.drawCircle(30, 80, 20, 0x3333FF)
25    M5.Lcd.fillCircle(80, 80, 20, 0x009900)
26    M5.Lcd.drawEllipse(60, 140, 50, 30, 0x00FF00)
27    M5.Lcd.fillEllipse(60, 140, 30, 20, 0xFFFF00)
28    M5.Lcd.drawLine(115, 10, 115, 60, 0xFF0000)
29    M5.Lcd.drawRect(125, 10, 40, 30, 0xFF0000)
30    M5.Lcd.fillRect(125, 50, 40, 30, 0x00FF00)
31    M5.Lcd.drawTriangle(135, 150, 110, 190, 160, 190, 0x00FF00)
32    M5.Lcd.fillTriangle(145, 150, 170, 190, 190, 150, 0x0000FF)
33    M5.Lcd.drawArc(10, 180, 40, 45, 0, 90, 0xFFFF00)
34    M5.Lcd.fillArc(20, 190, 40, 45, 0, 90, 0x00FFFF)
35
36
37def loop():
38    M5.update()
39
40
41if __name__ == "__main__":
42    try:
43        setup()
44        while True:
45            loop()
46    except (Exception, KeyboardInterrupt) as e:
47        try:
48            from utility import print_error_msg
49
50            print_error_msg(e)
51        except ImportError:
52            print("please update to latest firmware")
示例输出:
无
API 应用
- class M5.Display
- width()
获取显示屏水平分辨率。
- Returns width:
水平分辨率。
- Return type:
int
UiFlow2 代码块:

MicroPython 代码块:
Display.width()
- height()
获取显示屏垂直分辨率。
- Returns height:
垂直分辨率。
- Return type:
int
UiFlow2 代码块:

MicroPython 代码块:
Display.height()
- getRotation()
获取显示屏旋转方向。
- Returns rotation:
旋转方向值
- Return type:
int
Rotation values:
1: 0° rotation
2: 90° rotation
3: 180° rotation
4: 270° rotation
UiFlow2 代码块:

MicroPython 代码块:
Display.getRotation()
- getColorDepth()
获取显示屏颜色深度。
- Returns depth:
以每像素位数表示的颜色深度。
- Return type:
int
UiFlow2 代码块:

MicroPython 代码块:
Display.getColorDepth()
- getCursor()
获取显示屏绘图光标位置。
- Returns pos:
tuple (x, y) 光标位置。
- Return type:
tuple
UiFlow2 代码块:

MicroPython 代码块:
Display.getCursor()
- setRotation(r)
设置显示屏旋转。
- 参数:
r (int) – rotation value (1~4) - 1: 0° rotation - 2: 90° rotation - 3: 180° rotation - 4: 270° rotation
UiFlow2 代码块:

MicroPython 代码块:
Display.setRotation(2)
- setColorDepth(bpp)
设置显示屏的颜色深度。
- 参数:
bpp (int) – 期望的颜色深度(以每像素位数表示)。
注意:对于 CoreS3 设备,颜色深度固定为 16 位,此方法无效。
UiFlow2 代码块:

MicroPython 代码块:
Display.setColorDepth(16)
- setEpdMode(epd_mode)
设置显示屏的 EPD 模式。
- 参数:
epd_mode (int) – desired EPD mode - 0: M5.Lcd.EPDMode.EPD_QUALITY - 1: M5.Lcd.EPDMode.EPD_TEXT - 2: M5.Lcd.EPDMode.EPD_FAST - 3: M5.Lcd.EPDMode.EPD_FASTEST
注意:仅适用于具有 EPD 功能的设备。
UiFlow2 代码块:

MicroPython 代码块:
Display.setEpdMode(2)
- isEPD()
检查显示屏是否为电子墨水屏(EPD)。
- Returns is_epd:
如果显示屏为 EPD,则返回 True,否则返回 False。
- Return type:
bool
UiFlow2 代码块:

MicroPython 代码块:
Display.isEPD()
- setFont(font)
置显示字体。
- 参数:
font –
字体类型,可选:
M5.Lcd.FONTS.ASCII7
M5.Lcd.FONTS.DejaVu9
M5.Lcd.FONTS.DejaVu12
M5.Lcd.FONTS.DejaVu18
M5.Lcd.FONTS.DejaVu24
M5.Lcd.FONTS.DejaVu40
M5.Lcd.FONTS.DejaVu56
M5.Lcd.FONTS.DejaVu72
M5.Lcd.FONTS.EFontCN24
M5.Lcd.FONTS.EFontJA24
M5.Lcd.FONTS.EFontKR24
UiFlow2 代码块:

MicroPython 代码块:
Display.setFont(M5.Lcd.FONTS.DejaVu18)
- setTextColor(fgcolor, bgcolor)
设置文本颜色和背景颜色。
UiFlow2 代码块:

MicroPython 代码块:
Display.setTextColor(0xFF0000, 0x000000)
- setTextScroll(scroll)
启用或禁用文本滚动。
- 参数:
scroll (bool) – 设置为 True 启用文本滚动,设置为 False 禁用文本滚动。默认值为 False。
UiFlow2 代码块:

MicroPython 代码块:
Display.setTextScroll(True)
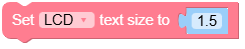
- setTextSize(size)
设置文本的大小。
- 参数:
size (int) – 期望的文本大小。
UiFlow2 代码块:
MicroPython 代码块:
Display.setTextSize(2)
- setCursor(x, y)
设置光标位置。
UiFlow2 代码块:

MicroPython 代码块:
Display.setCursor(10, 20)
- clear(color)
使用指定颜色清空显示屏
- 参数:
color (int) – 填充颜色,使用 RGB888 格式(默认值为 0)。
UiFlow2 代码块:

MicroPython 代码块:
Display.clear(0xFFFFFF)
- fillScreen(color)
用指定颜色填充整个屏幕。
- 参数:
color (int) – 填充颜色,使用 RGB888 格式(默认值为 0)。
UiFlow2 代码块:

MicroPython 代码块:
Display.fillScreen(0xFF0000)
- drawPixel(x, y, color)
在屏幕上绘制单个像素。
UiFlow2 代码块:

MicroPython 代码块:
Display.drawPixel(50, 50, 0x00FF00)
- drawCircle(x, y, r, color)
绘制一个圆。
- 参数:
UiFlow2 代码块:

MicroPython 代码块:
Display.drawCircle(60, 60, 20, 0x0000FF)
- fillCircle(x, y, r, color)
绘制一个实心圆。
- 参数:
UiFlow2 代码块:

MicroPython 代码块:
Display.fillCircle(60, 60, 20, 0x00FFFF)
- drawEllipse(x, y, rx, ry, color)
绘制一个椭圆。
- 参数:
UiFlow2 代码块:

MicroPython 代码块:
Display.drawEllipse(80, 40, 30, 20, 0xFF00FF)
- fillEllipse(x, y, rx, ry, color)
绘制一个实心椭圆。
- 参数:
UiFlow2 代码块:

MicroPython 代码块:
Display.fillEllipse(80, 40, 30, 20, 0x00FF00)
- drawLine(x0, y0, x1, y1, color)
绘制一条直线。
- 参数:
UiFlow2 代码块:

MicroPython 代码块:
Display.drawLine(10, 10, 100, 100, 0xFF0000)
- drawRect(x, y, w, h, color)
绘制一个矩形。
- 参数:
UiFlow2 代码块:

MicroPython 代码块:
display.drawRect(20, 20, 80, 50, 0x00FF00)
- fillRect(x, y, w, h, color)
绘制一个填充矩形。
- 参数:
UiFlow2 代码块:

MicroPython 代码块:
Display.fillRect(20, 20, 80, 50, 0x0000FF)
- drawRoundRect(x, y, w, h, r, color)
绘制一个圆角矩形。
- 参数:
UiFlow2 代码块:

MicroPython 代码块:
Display.drawRoundRect(30, 30, 60, 40, 10, 0xFF00FF)
- fillRoundRect(x, y, w, h, r, color)
绘制一个填充圆角矩形。
- 参数:
UiFlow2 代码块:

MicroPython 代码块:
Display.fillRoundRect(30, 30, 60, 40, 10, 0x00FFFF)
- drawTriangle(x0, y0, x1, y1, x2, y2, color)
绘制一个三角形。
- 参数:
UiFlow2 代码块:

MicroPython 代码块:
Display.drawTriangle(10, 10, 50, 80, 90, 10, 0xFF0000)
- fillTriangle(x0, y0, x1, y1, x2, y2, color)
绘制一个填充三角形。
- 参数:
UiFlow2 代码块:

MicroPython 代码块:
Display.fillTriangle(10, 10, 50, 80, 90, 10, 0x00FF00)
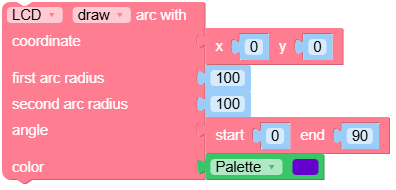
- drawArc(x, y, r0, r1, angle0, angle1, color)
绘制一个弧线。
- 参数:
UiFlow2 代码块:
MicroPython 代码块:
Display.drawArc(50, 50, 20, 30, 0, 180, 0xFF0000)
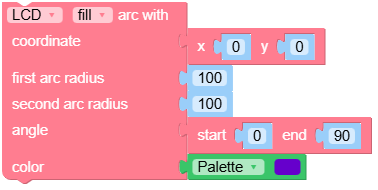
- fillArc(x, y, r0, r1, angle0, angle1, color)
绘制一个填充弧线。
- 参数:
UiFlow2 代码块:
MicroPython 代码块:
Display.fillArc(50, 50, 20, 30, 0, 180, 0x00FF00)
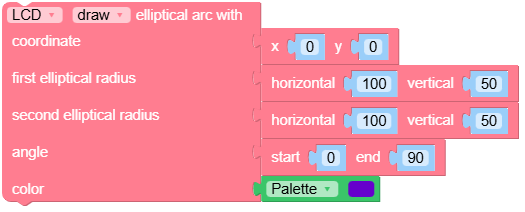
- drawEllipseArc(x, y, r0x, r1x, r0y, r1y, angle0, angle1, color)
绘制一个椭圆弧线。
- 参数:
UiFlow2 代码块:
MicroPython 代码块:
Display.drawEllipseArc(50, 50, 20, 40, 10, 30, 0, 180, 0xFF00FF)
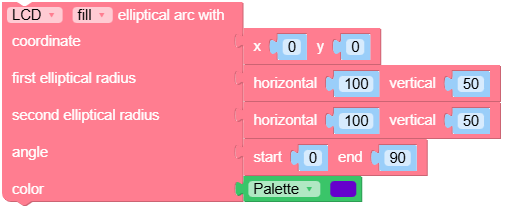
- fillEllipseArc(x, y, r0x, r1x, r0y, r1y, angle0, angle1, color)
绘制一个填充椭圆弧线。
- 参数:
UiFlow2 代码块:
MicroPython 代码块:
Display.fillEllipseArc(50, 50, 20, 40, 10, 30, 0, 180, 0x00FFFF)
- drawQR(text, x, y, w, version)
绘制二维码。
- 参数:
UiFlow2 代码块:

MicroPython 代码块:
Display.drawQR("Hello", 0, 0, 200)
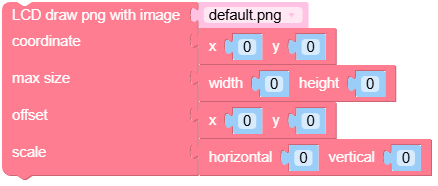
- drawPng(img, x, y, maxW, maxH, offX, offY, scaleX, scaleY)
绘制 PNG 图片。
- 参数:
UiFlow2 代码块:
MicroPython 代码块:
Display.drawPng("res/img/uiflow.png", 0, 0)
示例:
Display.drawPng("res/img/uiflow.png", 0, 0)
img = open("res/img/uiflow.png", "b")
img.seek(0)
Display.drawPng(img.read(), 0, 100)
img.close()
- drawJpg(img, x, y, maxW, maxH, offX, offY)
绘制 JPG 图片。
- 参数:
UiFlow2 代码块:

MicroPython 代码块:
Display.drawJpg("res/img/uiflow.jpg", 0, 0)
示例:
Display.drawJpg("res/img/uiflow.jpg", 0, 0)
img = open("res/img/uiflow.jpg", "b")
img.seek(0)
Display.drawJpg(img.read(), 0, 100)
img.close()
- drawBmp(img, x, y, maxW, maxH, offX, offY)
绘制 BMP 图片。
- 参数:
UiFlow2 代码块:

MicroPython 代码块:
Display.drawBmp("res/img/uiflow.bmp", 0, 0)
示例:
Display.drawBmp("res/img/uiflow.bmp", 0, 0)
img = open("res/img/uiflow.bmp", "b")
img.seek(0)
Display.drawBmp(img.read(), 0, 100)
img.close()
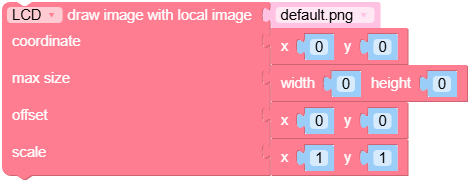
- drawImage(img, x, y, maxW, maxH, offX, offY)
绘制图片。
- 参数:
UiFlow2 代码块:
MicroPython 代码块:
img = open("res/img/uiflow.jpg", "b")
示例:
img = open("res/img/uiflow.jpg", "b")
img.seek(0)
Display.drawImage(img.read(), 0, 0)
img.close()
- drawRawBuf(buf, x, y, w, h, len, swap)
绘制缓冲区中的图片。
- 参数:
UiFlow2 代码块:
MicroPython 代码块:
Display.drawRawBuf(raw_buf, 0, 0, 100, 100, len(raw_buf), swap=False)
示例:
width, height = 40, 30
green565 = 0x07E0
raw_buf = bytearray(width * height * 2)
for i in range(width * height):
    raw_buf[2*i]   = (green565 >> 8) & 0xFF
    raw_buf[2*i+1] = green565 & 0xFF
Display.drawRawBuf(raw_buf, 100, 100, width, height, len(raw_buf), swap=False)
- print(text, color)
显示字符串(不支持格式化)。
UiFlow2 代码块:

MicroPython 代码块:
Display.print("Hello World", color=0xFF0000)
- printf(text)
显示格式化字符串。
- 参数:
text (str) – 要显示的格式化字符串。
UiFlow2 代码块:

MicroPython 代码块:
Display.printf("Value: %d" % 100)
- newCanvas(w, h, bpp, psram)
创建一个画布。
UiFlow2 代码块:
MicroPython 代码块:
w1 = Display.newCanvas(w=100, h=100, bpp=16)
示例:
w1 = Display.newCanvas(w=100, h=100, bpp=16)
w1.drawImage("res/img/uiflow.jpg", 80, 0)
w1.push(30, 0)
- startWrite()
开始向显示屏写入内容。
UiFlow2 代码块:

MicroPython 代码块:
Display.startWrite()
示例:
Display.startWrite()
Display.drawPixel(10, 10, 0xFF0000)
Display.endWrite()
- endWrite()
结束显示屏写入。
UiFlow2 代码块:

MicroPython 代码块:
Display.endWrite()